4 steps
Our pick for this week — follow along.
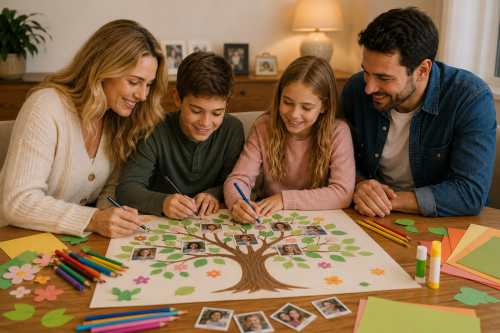
Family Tree Making Activity
🌳 Some activities are not just done to pass the time… Some teach children the feeling of "belonging."
The family tree activity is exactly such a work.
With this activity, the child does not just learn names. They realize where their own story began.
They start to imagine their grandmother's smile, their grandfather's childhood, and their mother's youth.
And slowly they begin to feel:
👉 “I am a continuation of a family.”
🧰 Required Materials
- Large cardboard or construction paper
- Colored markers
- Glue
- Scissors
- Family photos (optional)
- Leaf, flower stickers, or small decorations
- Pencil
🌿 Before Starting the Activity…
Have a short conversation with your child:
“Do you know what your mother's mother's name was?”
“What do you think your grandparents were like when they were kids?”
“What does it mean to be a family, in your opinion?”
This little chat transforms the activity from just a “homework” into an emotional connection.
🌳 Step by Step Family Tree Activity
1. Drawing the Tree Trunk
First, draw a large tree. It should have thick branches. Because each branch will represent a person from the family.
The child can decorate the tree as they wish. What matters here is not that it looks perfect, but that they add their own imagination.
2. Placing Family Members
Start by writing the names of the older family members. Grandmother, grandfather, mother, father, siblings…
If you want, you can also paste small photos.
During this time, the child learns many new things:
“What was your grandfather's name?”
“What did your grandmother do when she was a child?”
And the activity gradually turns into a story.
3. Sharing Memories
Each time a name is written, tell a small memory.
“Your grandfather was very good at making kites when he was little.”
“Your grandmother made the best dishes.”
Right here, the child begins to recognize not just names, but people.
4. Decorating the Tree
Leaves, small hearts, colorful drawings…
Perhaps a different color can be chosen for each family member. Because each person is another branch of the same tree.
5. Reviewing Together
When the activity is finished, look at the tree together.
And let your child feel:
👉 “You are a very valuable part of this story.”
This feeling leaves a much larger place in children's inner worlds than we think.
🌸 You Can Make the Activity More Special
- You can call family elders and listen to small memories
- You can add small notes next to the tree
- You can start conversations like “What was our family's funniest memory?”
- You can hang the family tree in your child's room
💛 Small But Important Notes
- Do not try to correct the child
- You do not have to make everything perfect
- Enjoy the process
- Allow them to share memories
🌿 Final Word
Knowing a child's roots helps them feel stronger.
Because when a person knows where they come from, they stand more firmly in life.
Perhaps years later that cardboard will wear out a bit… But the moments spent together, the stories told, and the conversations held will continue to live inside the child.
Because some activities are not just crafts… They are a silent reminder of being a family.
🌳 Continue to rebuild with love.
Step-by-step
-
Step 1
Drawing the Tree Trunk
Let’s draw a big tree. Each branch will represent a member of the family.
-
Step 2
Adding Family Members
First, let’s write their names. Then, let’s glue on the photos.
-
Step 3
Sharing Memories

Her isim yazıldığında küçük anı paylaşın.
-
Step 4
Decorating the Tree

Decorate the tree and take a look at it together.